How to convert CDA to MP3?
CDA to MP3 ripping introduction
 One of the best file formats for CD ripping is MP3. MP3 files are able to store audio data using a way less memory than other formats. Smaller files are faster to
download or share and have less expensive storage requirements. Thus, CDA to MP3 ripping, provides a more flexible and affordable way of distributing, managing
and listening to music.
During the CD to MP3 ripping process, CD ripper compresses each CD Audio file and stores it on your hard disk as MP3 file or another file format.
So, you can manage the music on your PC, burn a mix CD, play the songs without having to find and insert the CD and simply enjoy your
favorite music on the go with a portable device, such as an MP3 player.
This user friendly guide will teach you how to rip your Audio CD to MP3 with DiscRipper at amazing ripping
speed and with excellent output quality.
Step 1: Download and install the DiscRipper CD ripper
Download the DiscRipper CD ripper from here. Install the application on your PC following the on-screen instructions.
Step 2: Launch CD to MP3 ripper
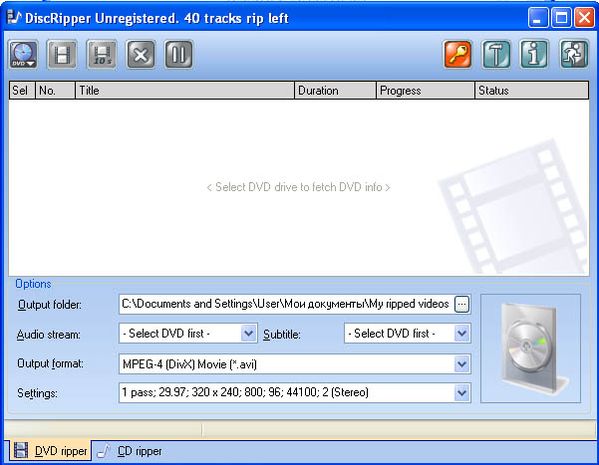
Launch the DiscRipper CD ripper and the interface is as follows:
Step 3: Choose CD ripper tab
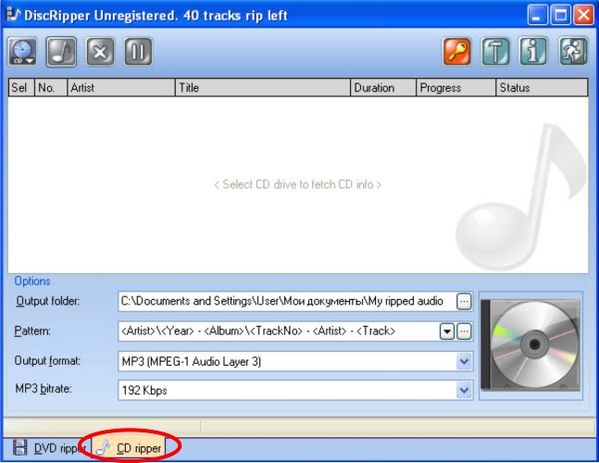
Choose CD ripper tab at the bottom of application window to rip CD Audio files.
Step 4: Insert your Audio CD. Select CD/DVD drive
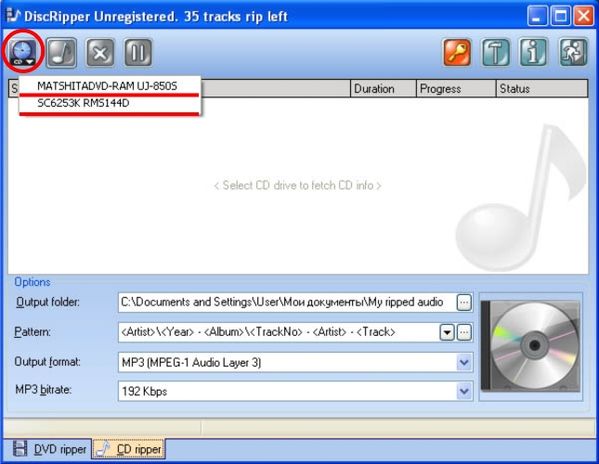
Insert your CD disc to be converted to MP3 into CD/DVD driver.
Select CD/DVD drive on your computer with the audio CD to be ripped from the dropdown window.
Step 5: (Optional) Set CD information options
DiscRipper reads CD Text to get information about tracks (artist, title or track details). Often no CD Text is present on the CD.
When your computer is connected to the Internet, the program automatically attempts to fetch information about the tracks being ripped from an online database.
You can also rip a CD to MP3 file format when your computer is not connected to the Internet. However, the CD ripper will not be able to identify the name of the CD,
the artist that created it, or the names of the songs until you go online.
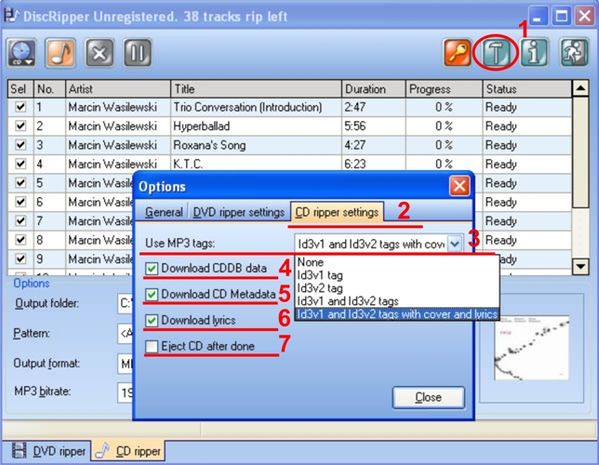
You can also change CD ripper settings so that DiscRipper will automatically fetch all CD tracks information from internet database, grab album covers
and even lyrics for all songs. You can do it by clicking Program Settings (CTRL+P) button (1) and selecting CD ripper settings tab (2) in a new window. DiscRipper offers to set
- which MP3 tags to use for CD to MP3 ripping (3)
- and whether to download CDDB data (4), CD Meta data (5) or lyrics (6).
- The CD can be also automatically ejected after finishing CDA to MP3 ripping (7).
All this information will be stored in MP3 tags (both Id3v1 and Id3v2 so there is no need to do that manually anymore).
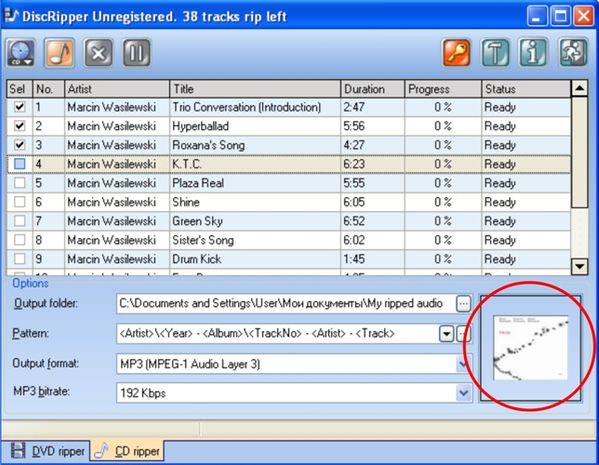
You can check CD Meta data, such as artist, title, album, genre etc., by clicking the icon on the right at the bottom of main window:
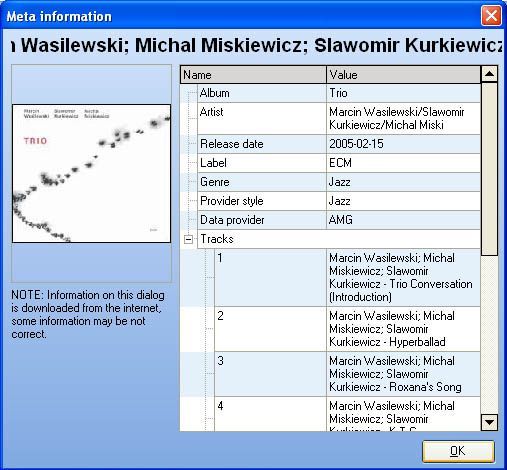
And the CD Meta information is as follows:
Step 6: Select CD Audio files you want to rip
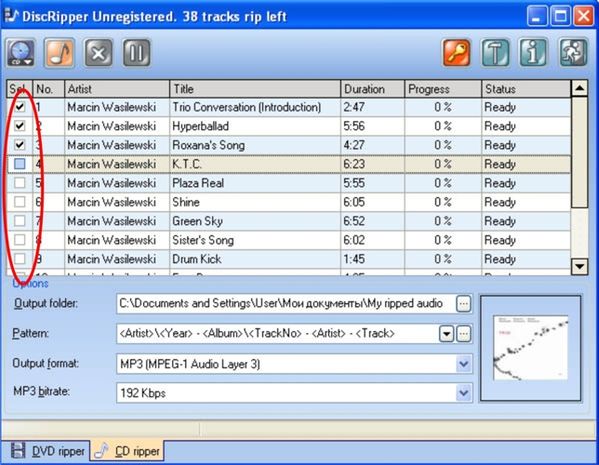
The track list is shown in user-friendly format, with titles, artists etc.
By default, all files are selected for CD to MP3 ripping. You can uncheck files that you don't want to convert from CDA to MP3 format.
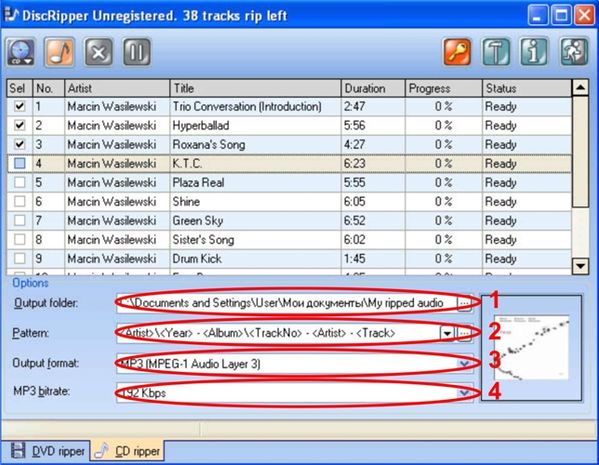
Step 7: Set output folder, pattern filename format, MP3 output format and bitrate of the output MP3 file
DiscRipper CD ripper offers to make one or more of the following changes for CD to MP3 converting:
- Output folder. By default, the output folder "My ripped audio" is already set in My Documents folder on your computer. If you want to store CD to MP3 ripped files in a different folder you can browse existing folders or create a new one. (1)
- Pattern. If you want to use a different filename format for CDA to MP3 ripped files, you can choose one from the dropdown list or create your own pattern. The information for filenames and folder names is taken from online database, or from CD Text (if present). (2)
- Output format. Choose a format for the files that are created during CD ripping. The default format is MP3, which optimizes the balance between file size and sound quality. However, DiscRipper can both backup your audio CD into MP3 format and rip CD into APE files, OGG or WAV audio file formats. (3)
- Output file bitrate. You can adjust the compression quality used during ripping. Choose a quality setting that represents the best balance between quality and file size for your needs. If you are not sure what setting to use, try ripping CD Audio files to different formats and bitrates and then play the files. You can select bitrates from 32Kbps to 320Kbps. (4)
Step 8: Start CDA to MP3 ripping process
Start CD ripping process by pressing the Rip CD button (1).
You can see the progress and status of each file being ripped:
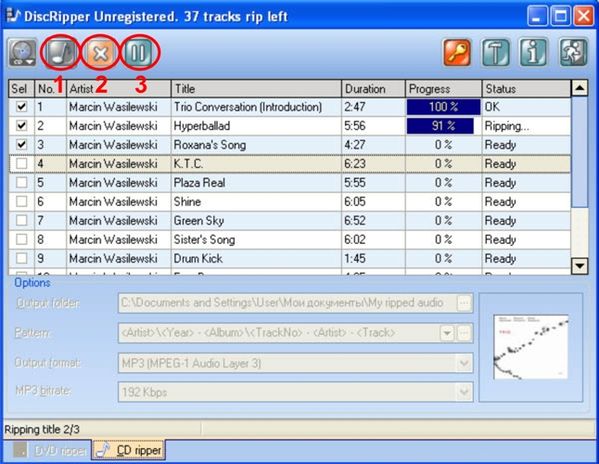
You can pause or terminate the CD to MP3 ripping process by clicking the Terminate (2) or Pause/Resume button (3).
The converted MP3s can be found in the folder specified earlier.
And finally, after you have ripped your CD collection, you can enjoy your favorite music:
- Finding and playing any song becomes really easy and fast (no more plastic cases or storage problems, and fumbling CDs in and out of the CD drive).
- Pick the music that you like and burn a mix CD to play in your car or home stereo.
- Enjoy your favorite music in your portable MP3 players anytime and anywhere.
Download DiscRipper